Cloud Computing is one of the cutting-edge technologies in today's informational market that helps in digital transformation. It has rapidly developed over the past few years, fueled by storage demands, easy usage, and automated software upgrades. The core foundational services of any enterprise network are its DNS, DHCP, and IPAM. Therefore, finding an enterprise-grade DDI solution that can drive the cloud adoption approach by automating DDI services is challenging for most organizations. TCPWave delivers a single pane of glass to manage the DNS records in multiple cloud service providers such as AWS, AKAMAI, Google, etc., which help to create a plethora of opportunities to reduce costs with more network security, greater flexibility, and scalability. This whitepaper provides insights into NS1 integration within the TCPWave IPAM application.
TCPWave IPAM - NS1 Integration
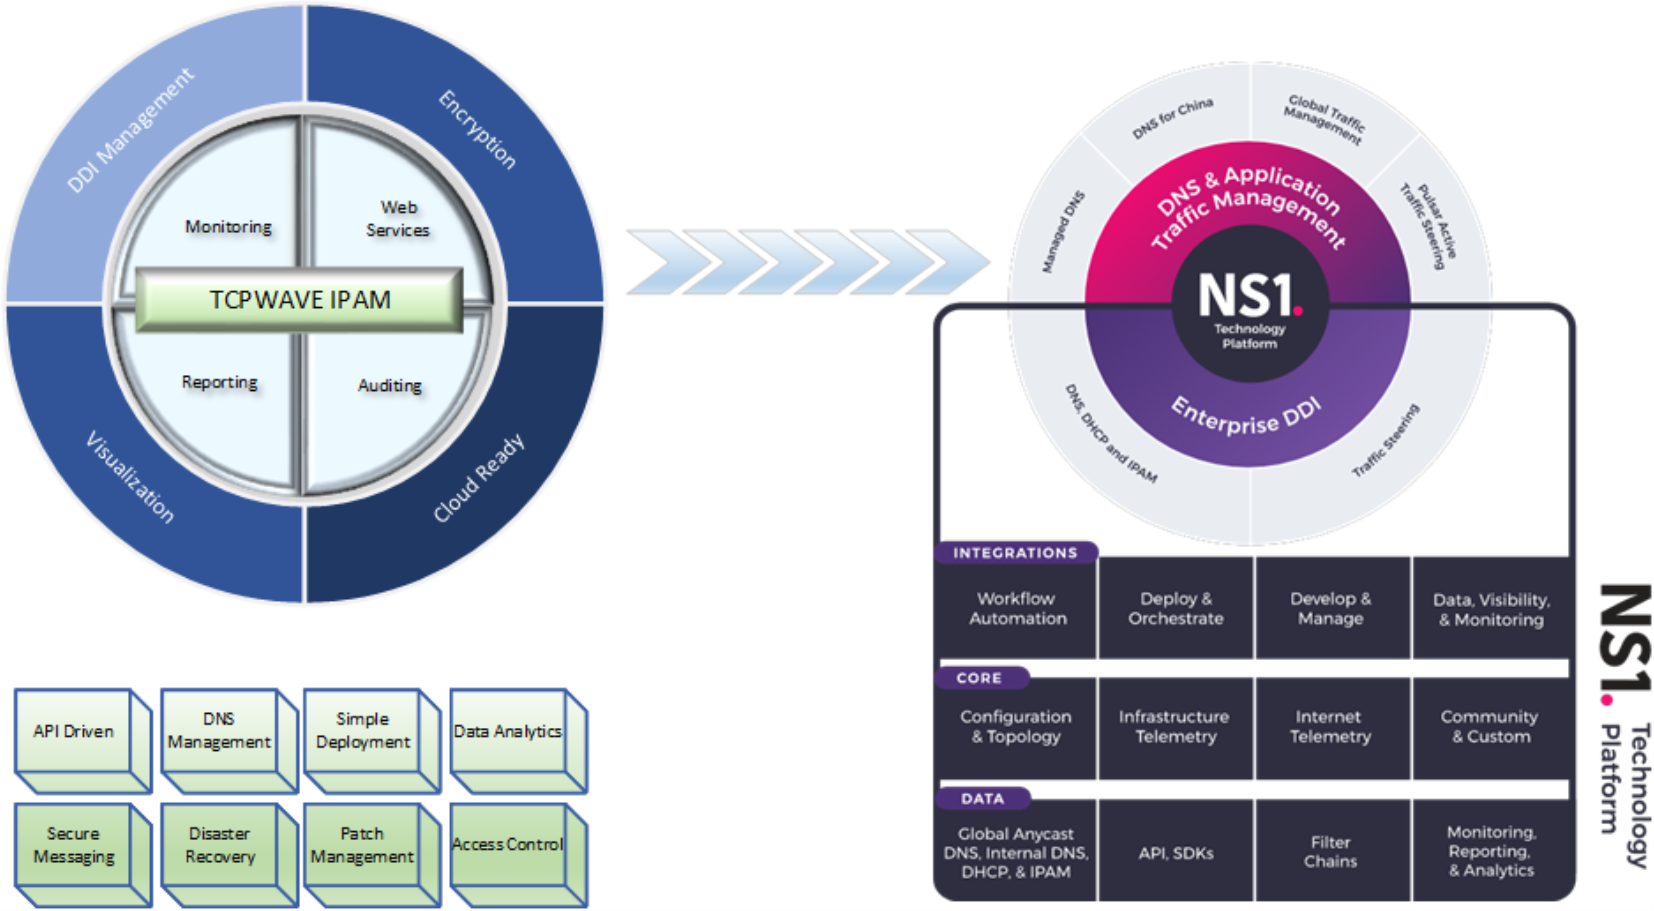
Architecture Overview
The NS records are the DNS delegation records set with your registrar to delegate a domain/sub-domain to a set of name servers. Public DNS service providers, such as NS1, hold the DNS records for your public-facing domain and tell the other computers connected to the internet what records your domain holds. A public hosted zone contains information about routing traffic and resource record sets for domains and sub-domains of queries that come from the public internet and are resolved within the NS1 infrastructure. TCPWave IPAM - NS1 integration enables the management of DNS records hosted on NS1 by an on-premise TCPWave IPAM through secure API connections to the NS1's API framework. In an IPAM deployment that consists of an on-premise network and an NS1 public cloud, you can leverage the TCPWave IPAM solution to achieve centralized DNS data visualization, secured management, and enforce auditing on all the associated network operations.
DNS zones support multiple resource record types such as A/AAAA, Alias, PTR, NS, SOA, MX, TXT, CNAME, SRV, and SPF. Any of the records mentioned above that are already present in the NS1 hosted zone can be bulk imported into the TCPWave IPAM solution, providing a seamless, centralized, and secured interface to manage the public-facing DNS records.
Configuration of NS1 in TCPWave IPAM
To configure NS1 Cloud Provider in TCPWave IPAM, follow the sequential order:
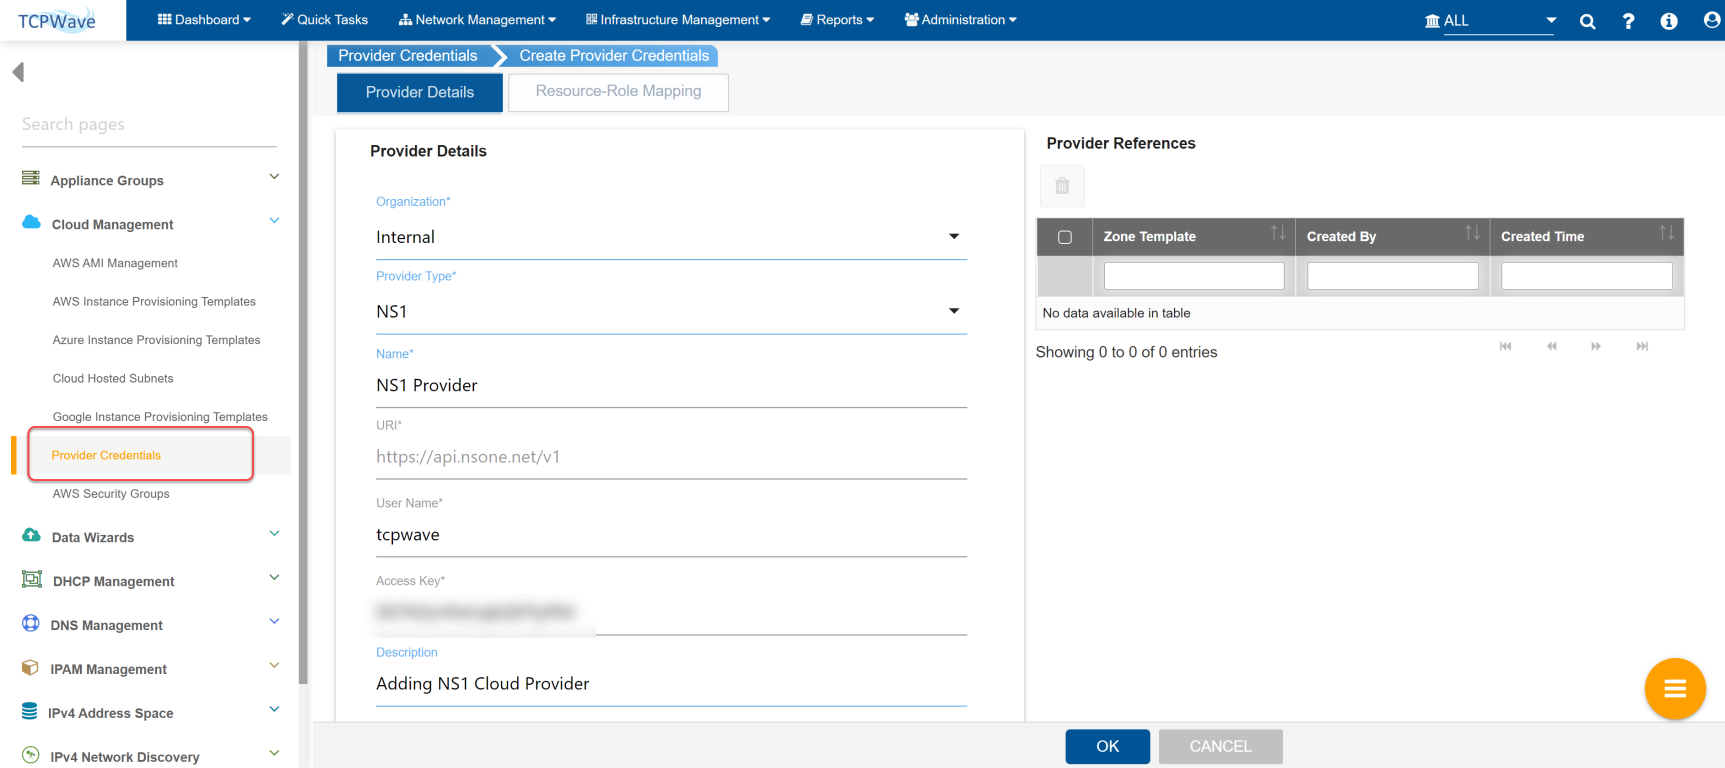
Navigate to Network Management >> Cloud Management. By default, the system displays the Provider Credentials page.
Click . The system displays the Provider Details tab. Under ProviderDetails, complete the following fields:
Organization: Select the organization from the drop-down where you want to associate the Cloud Provider.
ProviderType: Select the Cloud Provider type as NS1.
Name: Enter the name of the Cloud Provider to be displayed in the IPAM.
URI: This field is pre-populated with https://api.nsone.net/v1, which is greyed out.
User Name: Enter the account name of the NS1 console.
Access Key: Enter the access key generated in the NS1 console.
Generating Access Key
To generate an access key in the NS1 console, follow the below steps:
Login to NS1 console.
Click a username in the upper-right corner.
Select Settings >> Users & Teams.
Navigate to the API KEYS tab.
Click Add key. The system displays the Manage Key pop-up.
Enter the API name to be displayed in the API Keys grid. The system displays the API name and generated API Key.
Click to view the generated API key. Copy the key from the NS1 console and enter it in the access key field of the TCPWave IPAM Provider Credentials page.
Note: The NS1 uses API keys to authenticate requests. Refer to the NS1 console to create a new API key with the necessary permissions.
Description: Enter the required description while creating a Cloud Provider.
Note: Provider References: In this grid, you can view the associated zone templates for the respective Cloud Provider.
Click OK. The system displays a validation message "Are you sure you want to add the Cloud Provider? Click YES to Proceed."
Click YES. The system displays a confirmation message "Cloud Provider has been added successfully."
The added Provider Credentials are displayed under the Provider Credentials grid with search and sortable column headers, as shown in the below figure.
Associating the Cloud Provider to DNS Zone Template
After adding the Cloud Provider, you are required to associate the Cloud Provider to the created zone template.
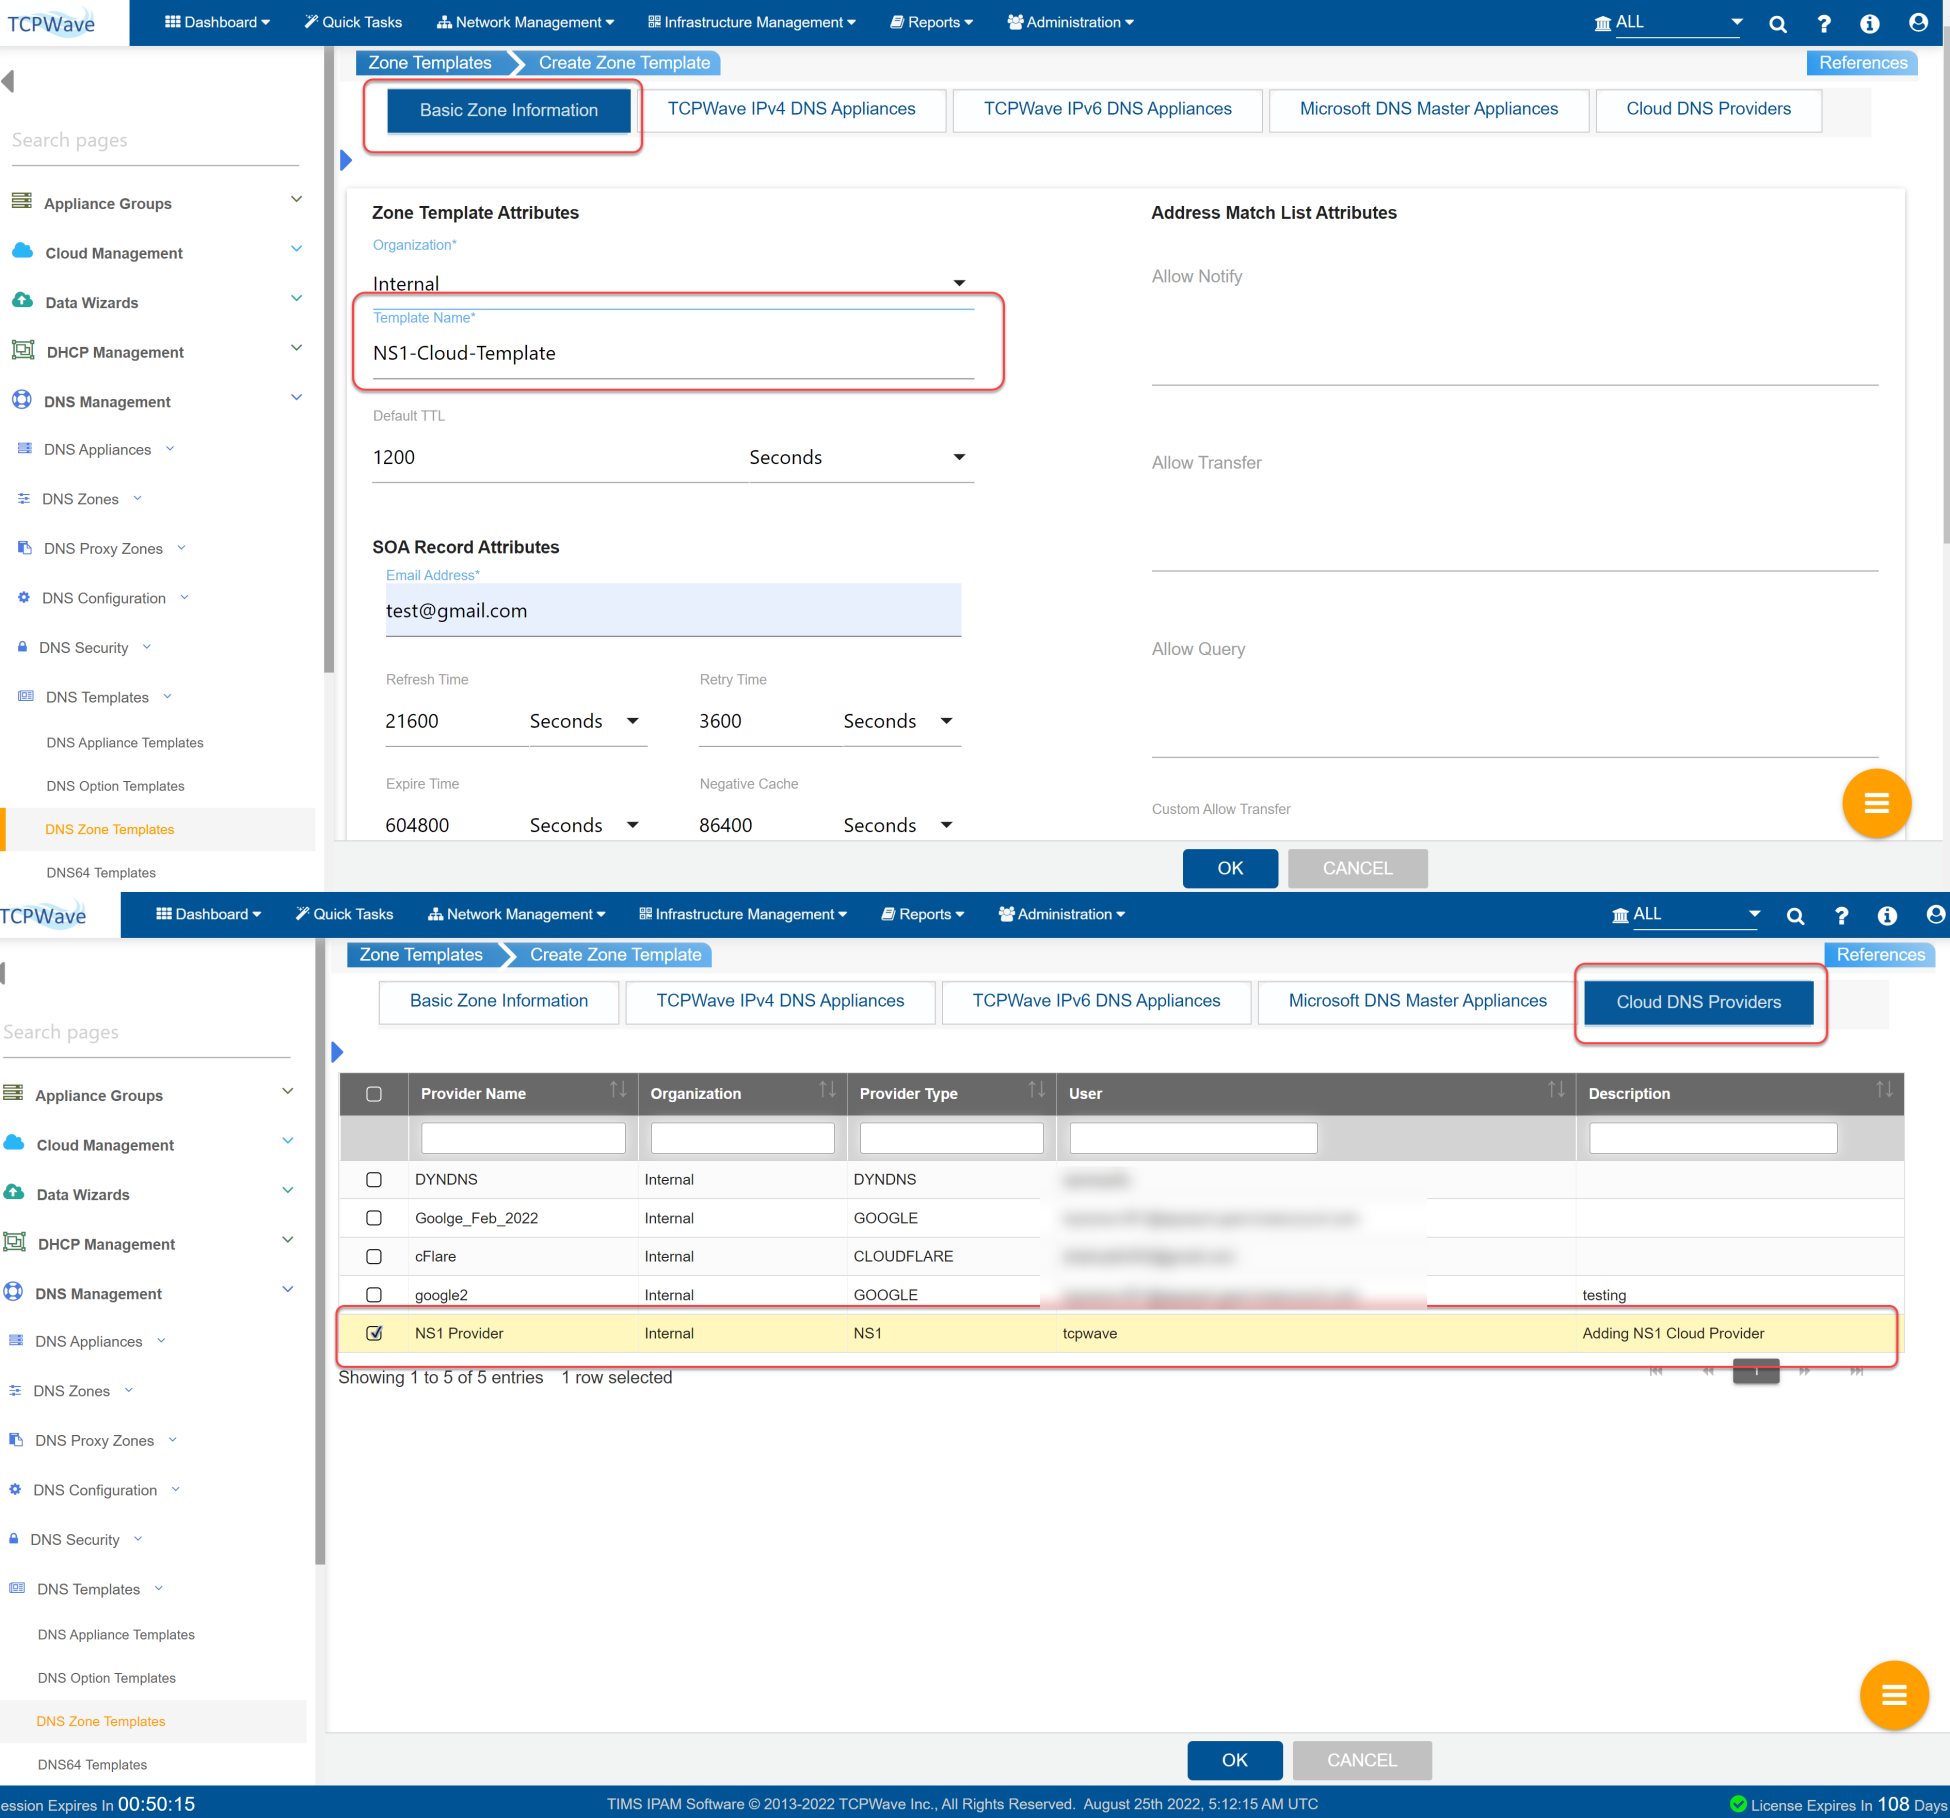
Navigate to Network Management >> DNS Management >> DNS Templates >> DNS Zone Templates.
Create the zone template. Example: NS1 -Cloud-Template and Click Cloud DNS Providers tab and select the Cloud Provider to associate the Cloud Provider to the NS1-Cloud-Template as shown:
Note: Details on all the configuration steps needed to add a zone template are presented in the TCPWave IPAM System Administrator Reference Guide.
Click OK. The system associates the NS1 Cloud Provider with the created zone template and displays it in the DNS Zone Templates grid.
Creating Zone
Create a zone and associate the created zone template with an NS1 Cloud Provider.
Navigate to Network Management >> DNS Management >> DNS Zones >> Managed DNS Zones.
Create the zone as example.com.
Note: Details on all the configuration steps needed to add a zone are presented in the TCPWave IPAM System Administrator Reference Guide.
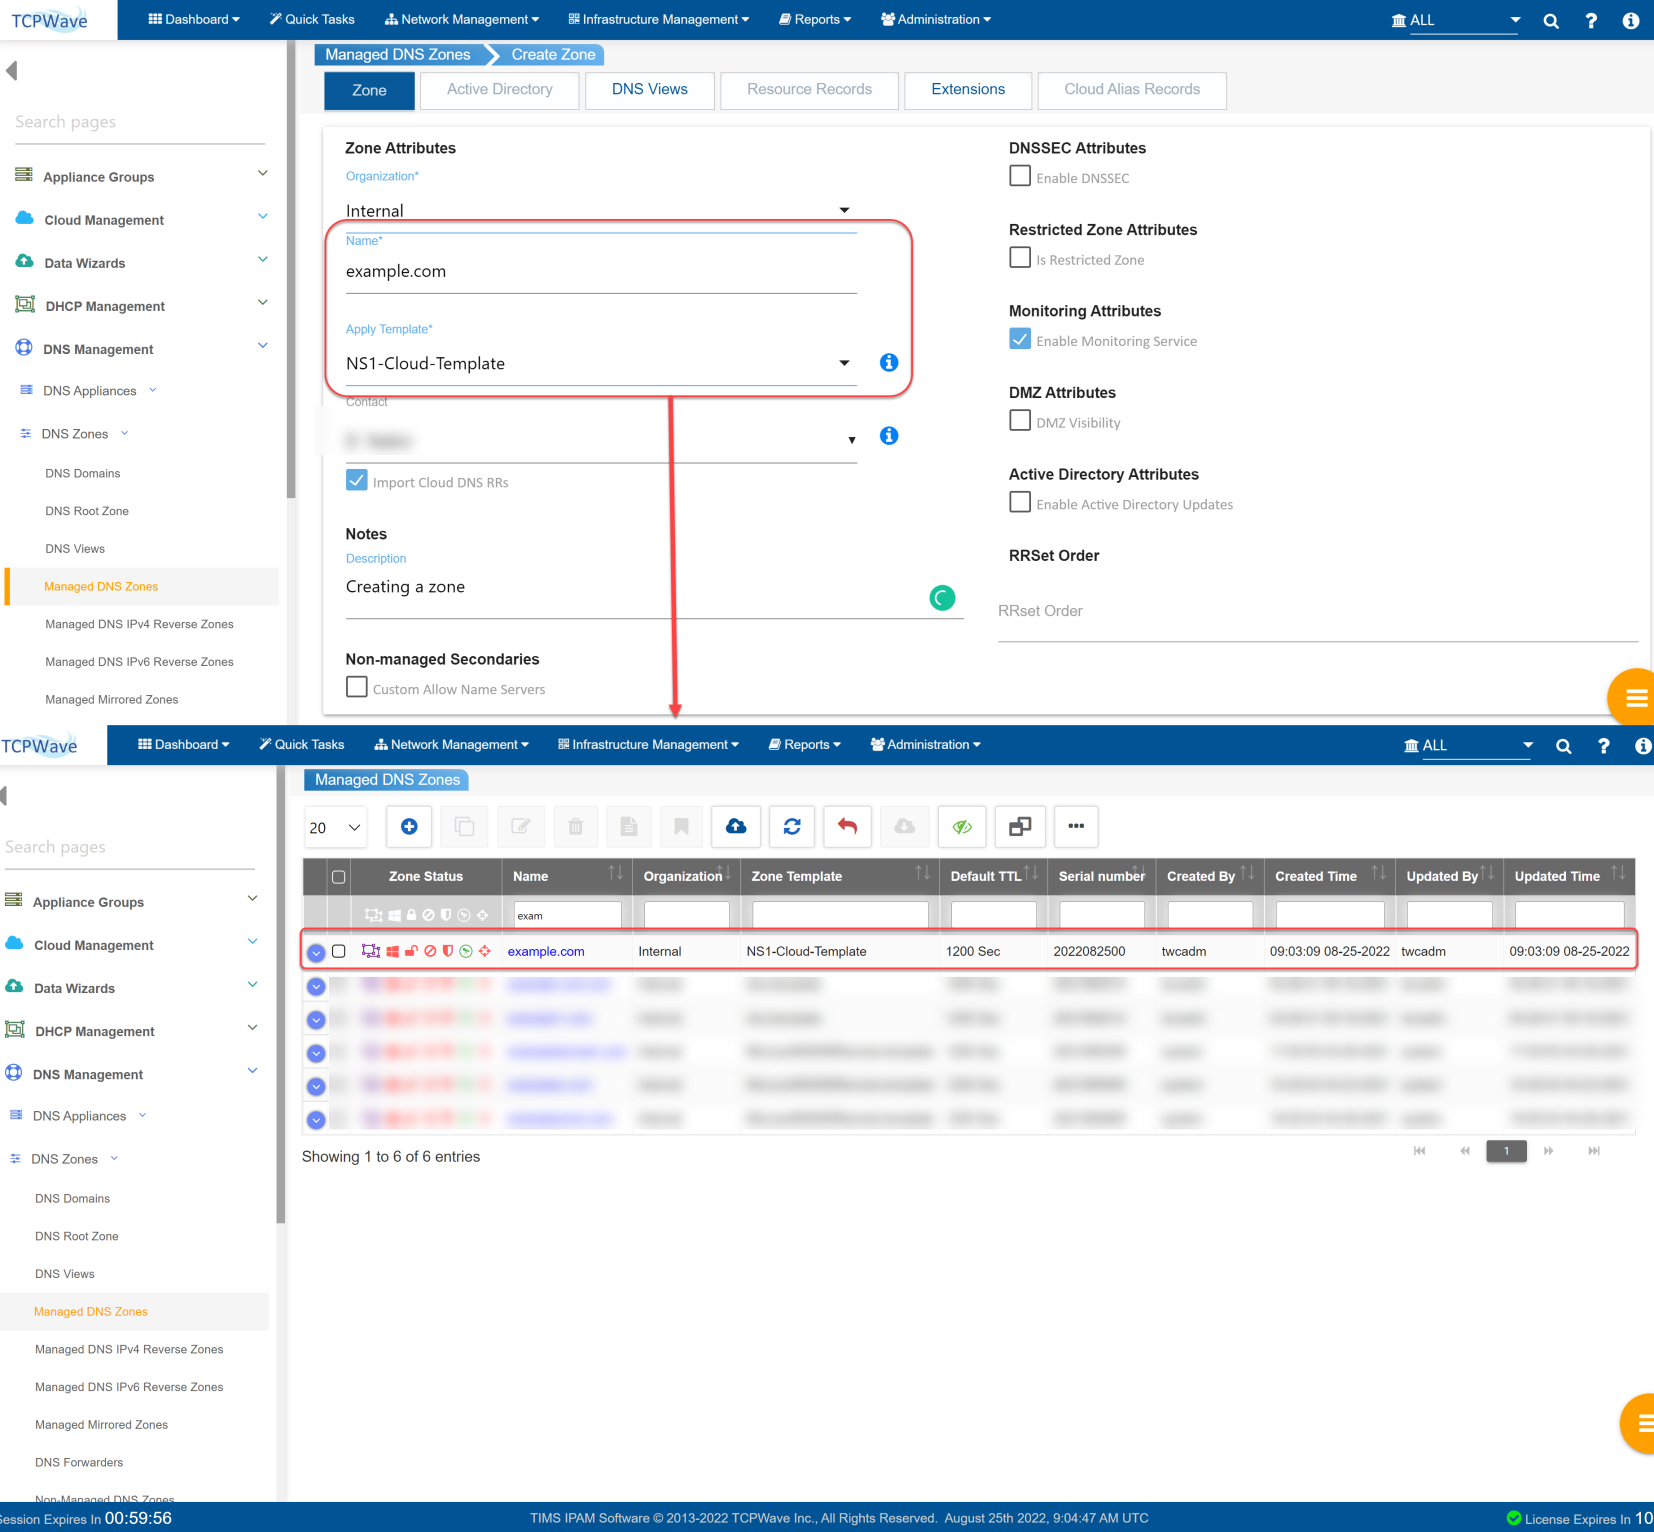
Under Apply Template field, select the NS1-Cloud-Zone-Template and associate it with the example.com zone.
Click OK. The system associates the template to the zone and displays the created zone in the Managed DNS Zones grid as shown:
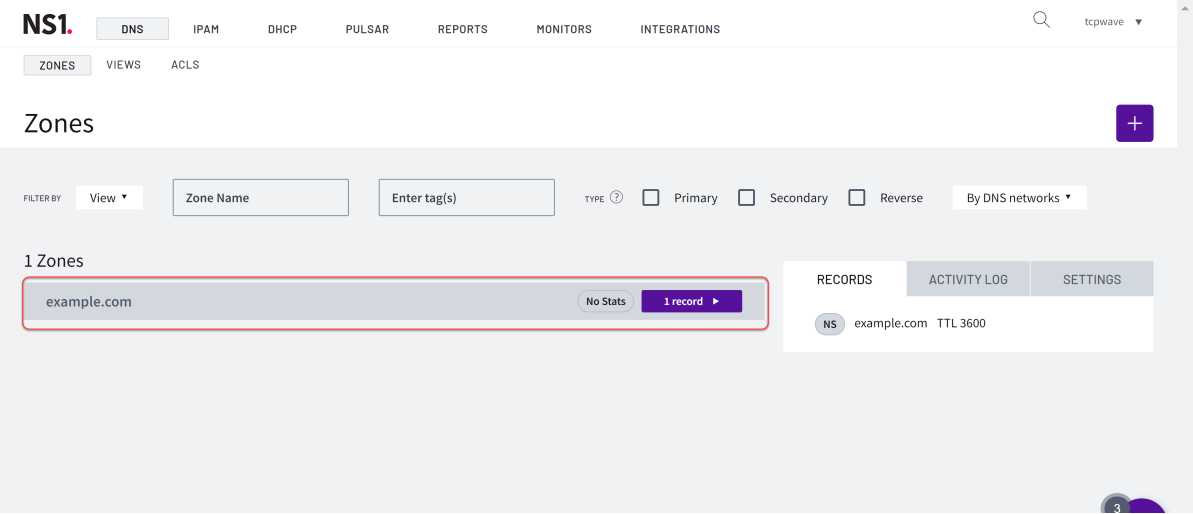
With the newly added NS1 API integration, the DNS zone example.com is created on the NS1 console as shown:
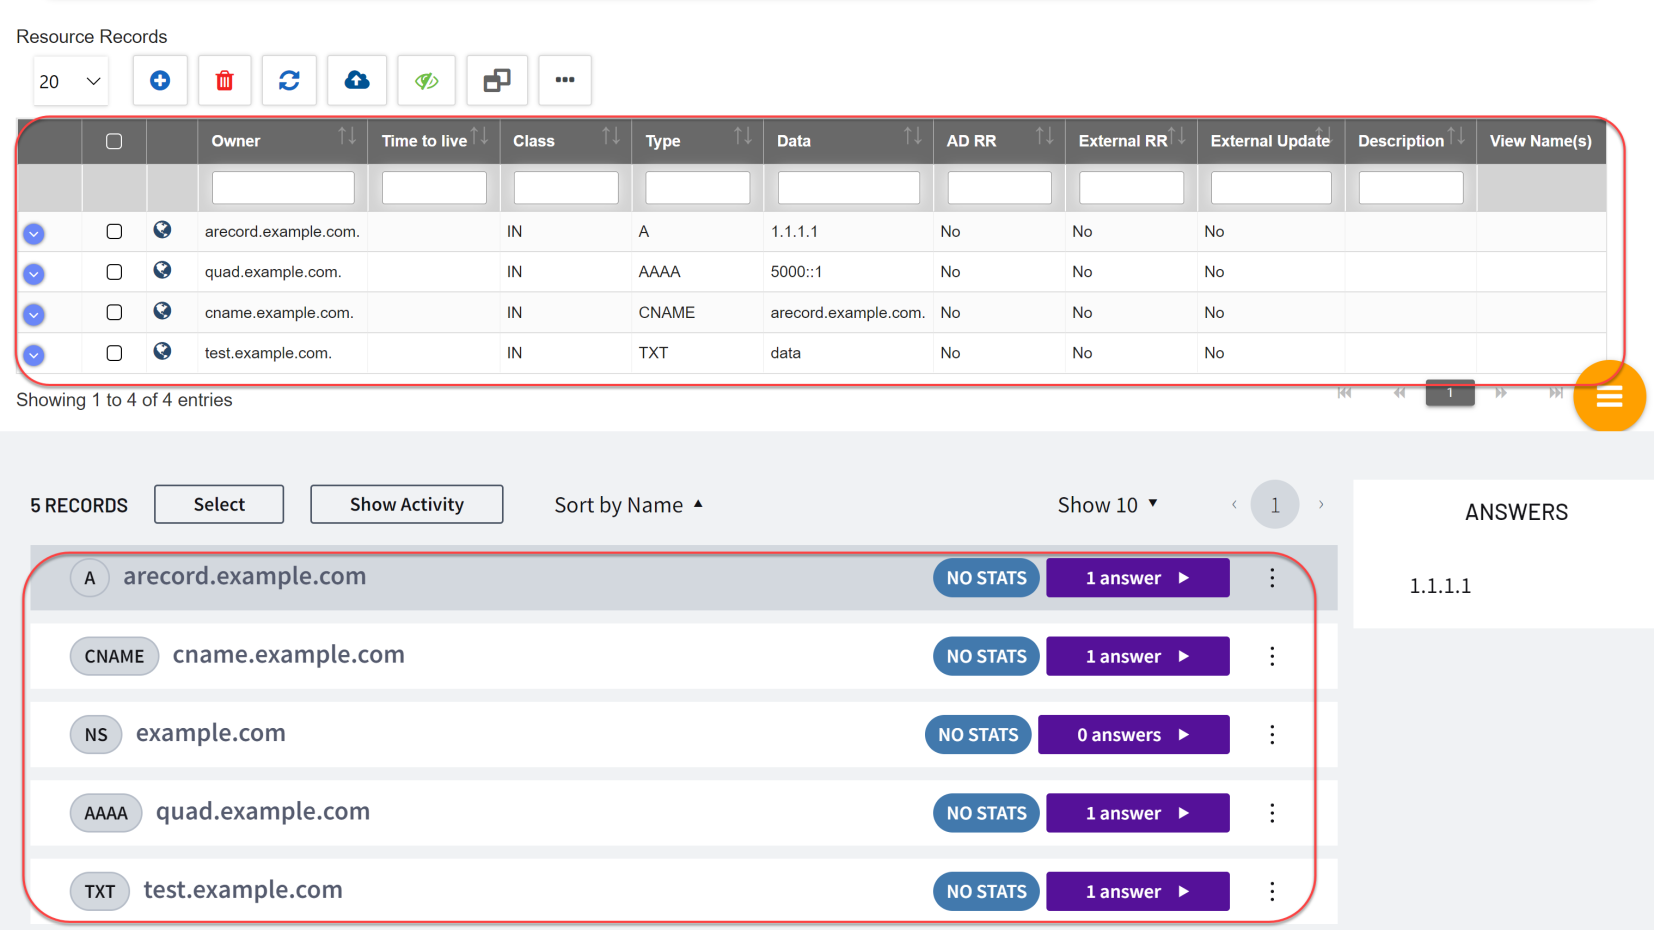
Creating DNS Records at Zone Level
The screenshot below shows that NS1 is updated via APIs when the on-prem TCPWave IPAM has DNS records and zone-level resource records.
Note :
Similarly, when the records are either edited or deleted from the TCPWave IPAM, the same changes are replicated in the NS1 provider without noticeable latency. The latency factor depends on the network connection speed from on-prem to NS1.
The object-level resource records can also be managed.
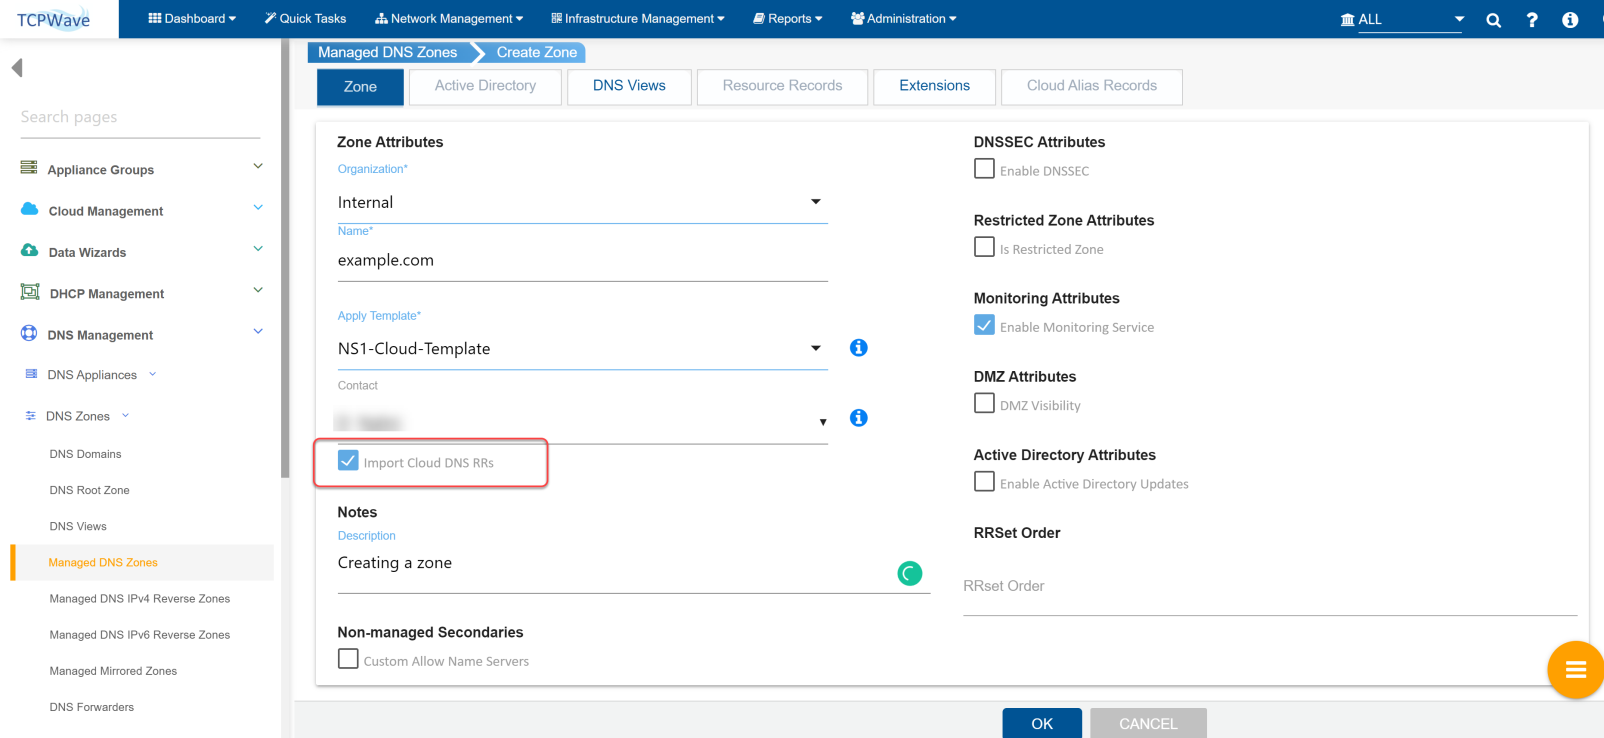
Importing Cloud DNS RR
To import cloud DNS RR, navigate to Network Management >> DNS Management >> DNS Zones >> Managed DNS Zones >> Add Managed DNS Zones >> Import Cloud DNS RR.
When you add a zone already existing in the NS1 console and enabling the import cloud DNS RRs checkbox, the system adds all the resource records present in the console to the IPAM.
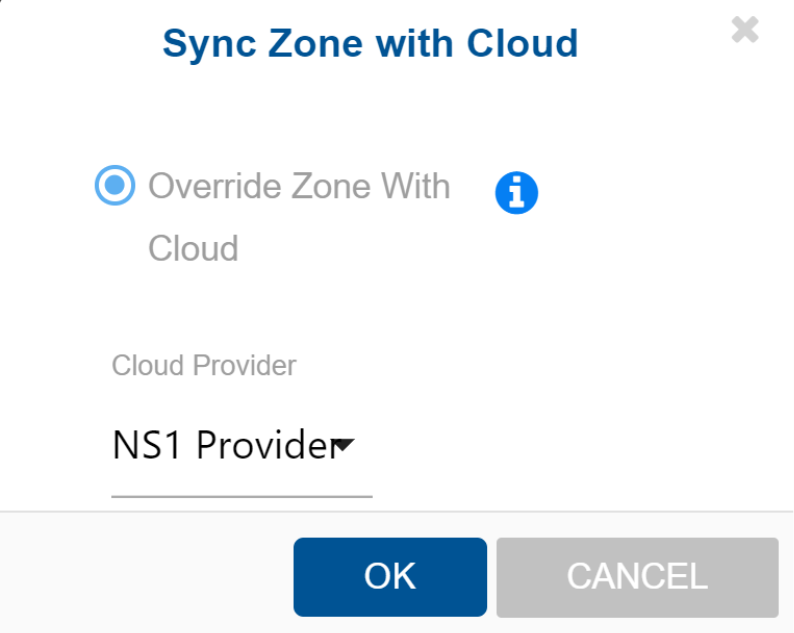
Sync Zone with Cloud
To sync zone with cloud, navigate to Network Management >> DNS Management >> DNS Zones >> Managed DNS Zones >> Right-click on zone >> Context menu option >> Administration >> Sync Zone with Cloud. The system displays the pop-up window.
Select the Cloud Provider from the drop-down.
Click OK. The system initiates the synchronization process, and the cloud resource records entirely override the resource records in the IPAM and display all the updated resource records in the IPAM.
Force Sync
To sync zone with cloud, navigate to Network Management >> DNS Management >> DNS Zones >> Managed DNS Zones >> Right-click on zone >> Context menu option >> Administration >> Force Sync. The system displays the pop-up window.
The force sync operation overrides the NS1 resource records with the TCPWave IPAM RRs.
Conclusion
The TCPWave IPAM's integration with NS1 provides a secure and centralized on-prem solution to manage the DNS records hosted on the public internet-facing DNS infrastructure. All communications to the NS1 infrastructure are performed using the NS1's APIs invoked from the TCPWave IPAM and are encrypted using the most robust ciphers. For a quick demo, contact the TCPWave Sales Team.
We use cookies on this site to
improve your browsing experience, analyze individualized usage, and
website traffic tailor content to your preferences, and make your
interactions with our website more meaningful. By clicking "Accept All" closing this banner, or continuing to browse this site, you
consent to the use of cookies.