Data drives most modern organizations; its integration and migration must be well-established seamless processes. Without a data migration plan, organizations end up with overwhelming data processes and can run over budget. DDI migration is an inherently risky business as the organizations tend to change the connectivity mechanism for every device and server on their network infrastructure without downtime incurrence. A lot can go wrong with all the configurations and routing pathways involved. Hence organizations look forward to having an interface to import the required data sets from any DDI solutions to the TCPWave environment. This white paper provides an insight into TCPWave's DDI Migration Wizard.
TCPWave's Approach - DDI Migration
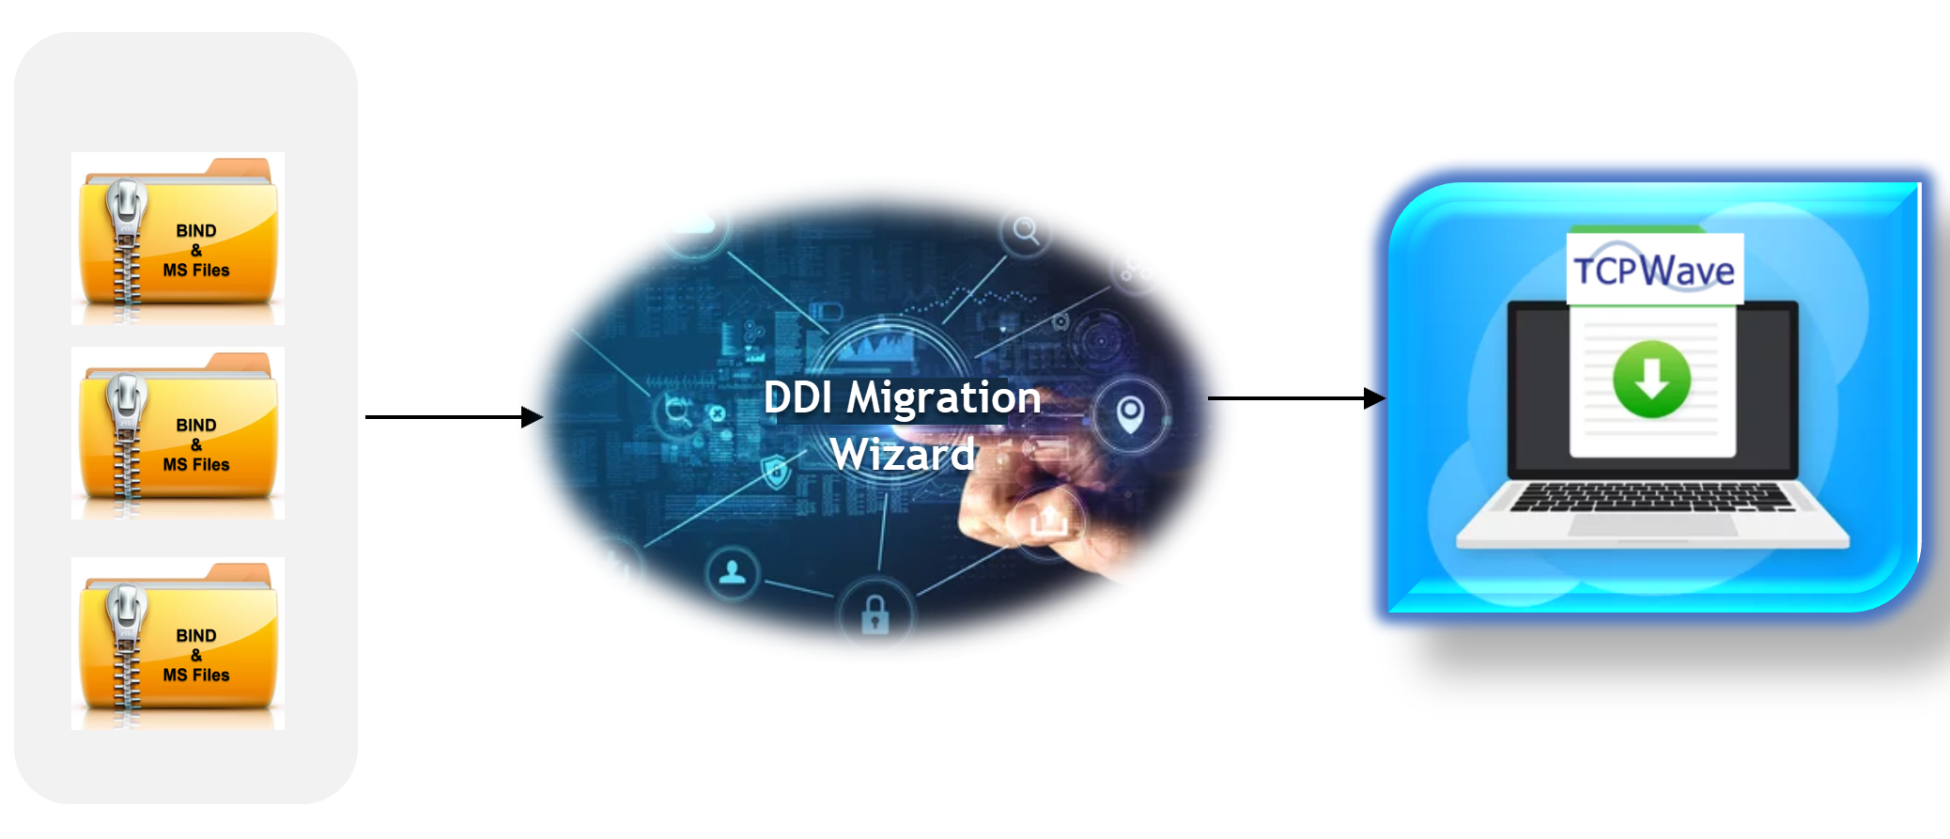
TCPWave's phase-wise migration approach helps the organizations methodically move the DNS and DHCP data that ensure risk mitigation to the core business functions. It simplifies the challenge of manual configuration and injects automation workflows to migrate with accuracy and speed, reducing the risk of human errors in IT network infrastructure. This approach makes the network teams quickly capitalize on new DNS/DHCP architectures to meet the organizational goals. TCPWave IPAM provides a simple interface to import and migrate spreadsheets using the DDI Migration Wizard. This wizard ensures a safe transition to the TCPWave environment from any format such as ISC BIND, Microsoft, etc.
DDI Migration Wizard
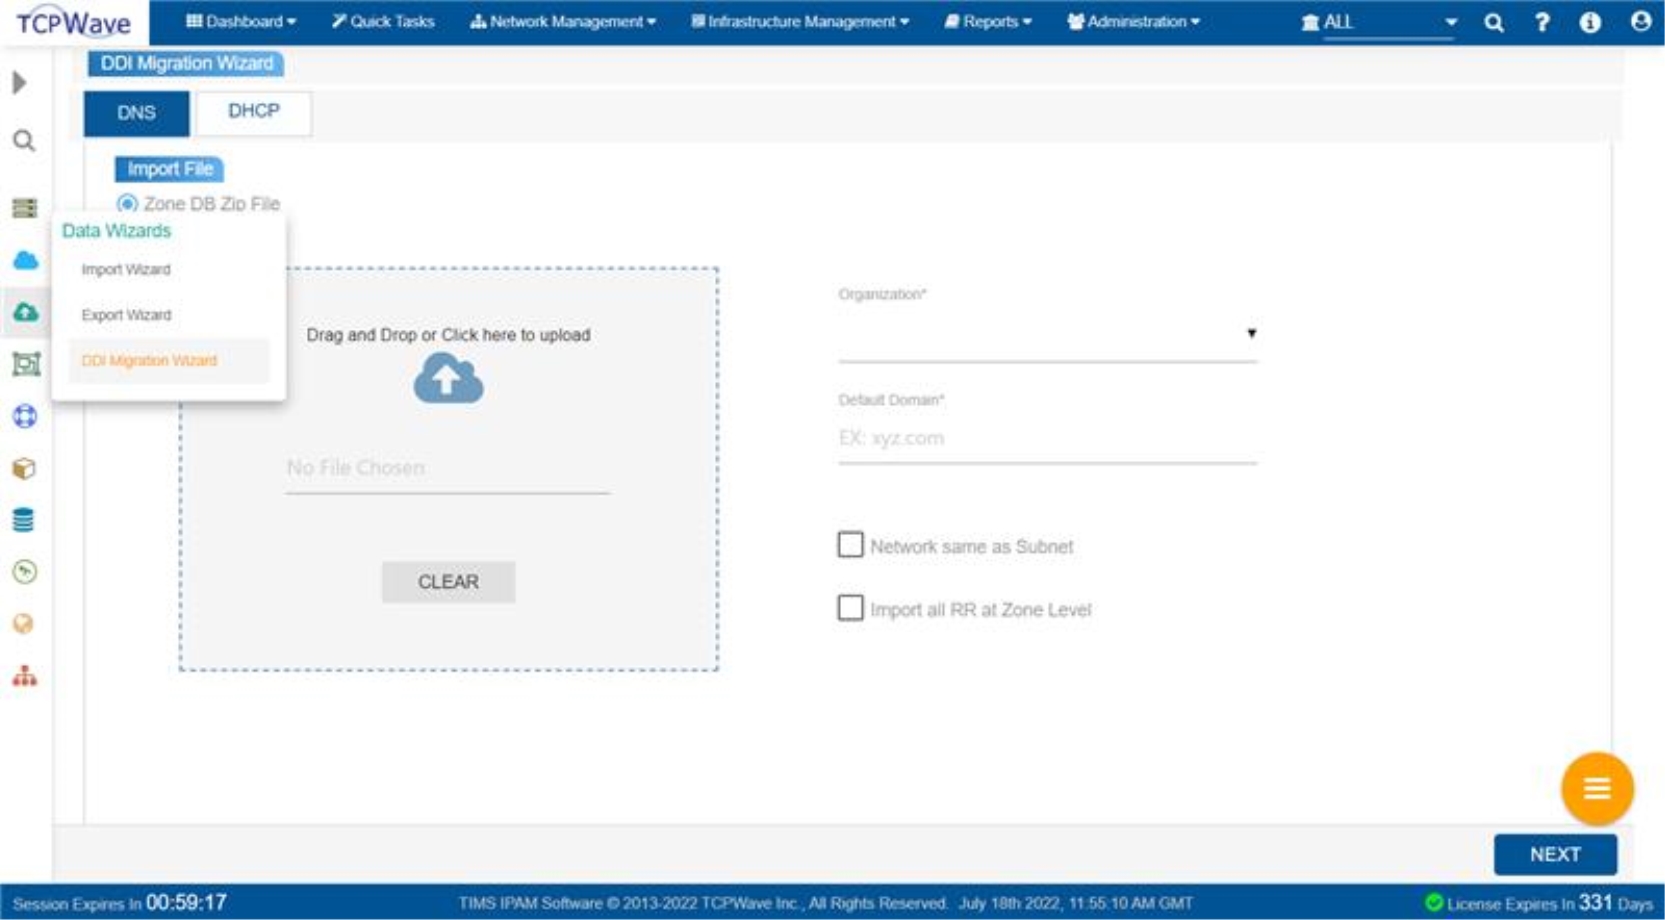
DDI Migration Wizard interface provides the functionality to import the data from zone files and XML, as per the BIND and MS file format. A zone file is the text file that describes a Domain Name System (DNS) zone. The interface displays the following tabs:
DNS
DHCP
Prerequisites
Before you import the files, ensure that you follow the proper naming convention as mentioned below:
In case of the zone DB zip file: Ensure you upload a valid zip file with valid db.zone files. Zone db file name should be a zone name.
Example: If the zone name is xyz.test.com, then the format should be as: db.xyz.test.com
In case of the MS XML zip file: Ensure that you upload a valid zip file that has valid XML files. The XML file name should be in the format SERVER_NAME-SERVER_IP.xml.
Example: If the server's name is appliance_test with the IP address as 1.2.3.4, then the format should be appliance_test-1.2.3.4. Ensure there is a hyphen present between the name of the server and its IP address.
Importing Zone DB Zip File
Under the DNS tab, to import the zone DB zip file:
Drag and drop the zone DB file or click to upload the file from the local machine.
Organization: Select the organization in which the data needs to be imported.
Views: Select the view from the drop-down. It allows a name server to segregate the data and provide a different view of the data based on who is accessing it.
Note: This field displays the list of views in the drop-down provided DNS Views are enabled from the Configuration Management >> Global Policy Management.
Default Domain: Enter the parent's name of the domain for a respective parameter which do not have one.
Network Same as Subnet: On selecting this check-box, the system assigns the same IP address of a subnet to a particular network.
Import all RR at Zone Level: On selecting this check-box, the system imports all the resource records at the zone level.
Click NEXT. The system displays the uploaded file in the Map Zone Template to Zones workspace with the "Select a template for all" drop-down field.
On selecting the template from the drop-down field, the system displays the validation message "Do you want to select a common template for all the zones?". Click Yes. The system associates the selected template to all the entities displayed in the workspace.
Click NEXT. The system initiates the data parsing and displays all the entities related to DNS in the Import Entities workspace with the following icons:
Note: You can also import the individual entities related to DNS using the import icon present in each entity row.
: On hovering this icon, the system displays the count of the imported records, failed records, total records, and time taken.
: On clicking the icon, the system downloads the error file.
: On clicking the icon, the system downloads the output file of the respective parameter.
: On clicking the icon, the system downloads the failed entries file of the respective parameter.
Click NEXT. The system displays the Import Summary in the Report workspace, allowing you to download the summary details.
Click FINISH. The system navigates you to the DDI Migration wizard workspace.
Importing MS XML Zip File
Under DHCP tab, to import MS-XML zip file:
Drag and drop the file or click to upload the file from the local machine.
Organization: Select the organization in which the data needs to be imported.
Default Domain: Enter the parent's name of the domain for a respective parameter which do not have one.
Click NEXT. The system initiates uploading, unzipping and parsing the data and displays all the entities related to DHCP in the Import Entities workspace with the following icons:
Note: You can also import the individual entities related to DHCP using the import icon present in each entity row.
: On hovering this icon, the system displays the count of the imported records, failed records, total records, and time taken.
: On clicking the icon, the system downloads the error file.
: On clicking the icon, the system downloads the output file of the respective parameter.
: On clicking the icon, the system downloads the failed entries file of the respective parameter.
We use cookies on this site to
improve your browsing experience, analyze individualized usage, and
website traffic tailor content to your preferences, and make your
interactions with our website more meaningful. By clicking "Accept All" closing this banner, or continuing to browse this site, you
consent to the use of cookies.